Raspberry Pi Kiosk

A kiosk can be useful for many reasons, especially when it can be created cheaply. All you need to get started
is a Raspberry Pi and a display you are willing to repurpose. For maximum flexibility we will use a browser to view
the content. Modern browsers can open many kinds of media and this approach will give you a great deal of flexibility.
To drive the browser we will be using the Selenium Library in our Python3 code. Don't know how to code in Python? Don't
worry!. I will provide you with a working example code and teach you how to modify it to suite your needs. Lets get started!
- Setting up the Pi
To begin, you will need a Raspberry Pi 3. Unfortunately I couldn’t get the Raspberry Pi B+ to work due to its older ARMv6 processor being incompatible with FireFox's geckodriver. A RPi 2 may work as there is a ARMv7 version of geckodriver but I haven't tested it.
On our Pi we will use the most recent version of Raspbian. Raspbian is a version of Debian Linux made specifically for the Pi. Get it from www.raspberrypi.org/downloads/raspbian/. The most recent at the time of writing was the January 2017 version. If you are on Linux use dd to write the iso to your SD card. For Windows use a utility like Win32 Disk Imager. If you'd like more detailed instructions for installing Raspbian on your Pi you can visit raspberrypi.org - installing-images.
Now fire that Pi up and go through initial setup. Raspbian will boot directly into a desktop environment. The first thing you should do is ensure that your keyboard region is set correctly. You can do this by opening the terminal (ctrl+alt+t) and typing
sudo raspi-config.
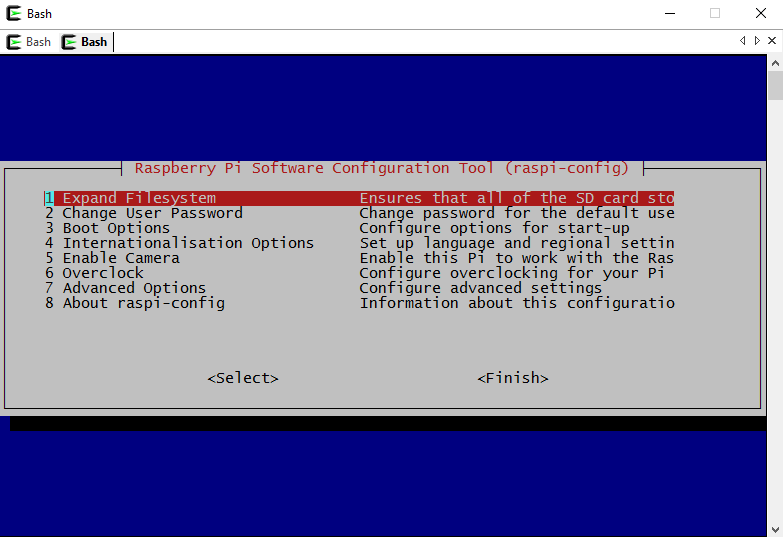
Under 'Internationalisation Options' you will find 'Change Keyboard Layout.' Select it and follow the prompts to set the Pi up for your region.
Next, lets enable ssh. You won't want to hook a keyboard and mouse to your kiosk every time you need to make a change. Still using the raspi-config configuration wizard, select 'Advanced Options' then select and allow SSH
Back at raspi-config's main menu, select 'Change User Password' and change the password for the 'pi' user to something secure. A side note: if you forget to set the correct keyboard region and you use special characters in your password if you later change your keyboard region you may find yourself in a pickle... don't ask how I know this! Finally, lets make sure the Raspberry Pi is fully up-to-date withsudo apt-get update && sudo apt-get upgrade
With that done we are ready to install selenium.
- Installing Selenium
For our kiosk to be functional it needs to be automated. When it boots it should go directly to the web content we want to display and begin doing what we want without our input.
On bootup I would need the pi to:- Open a browser
- Navigate to a web interface and log in
- Open several more tabs
- Have the browser go full-screen
- Cycle through the pages.
Luckily the Python package, Selenium, can do this for us. Let's install it now.
Python has an easy way of installing libraries named pip. Raspian should come with pip installed by default but if it isn't for some reason you can get it by typingsudo apt-get install python3-pip.
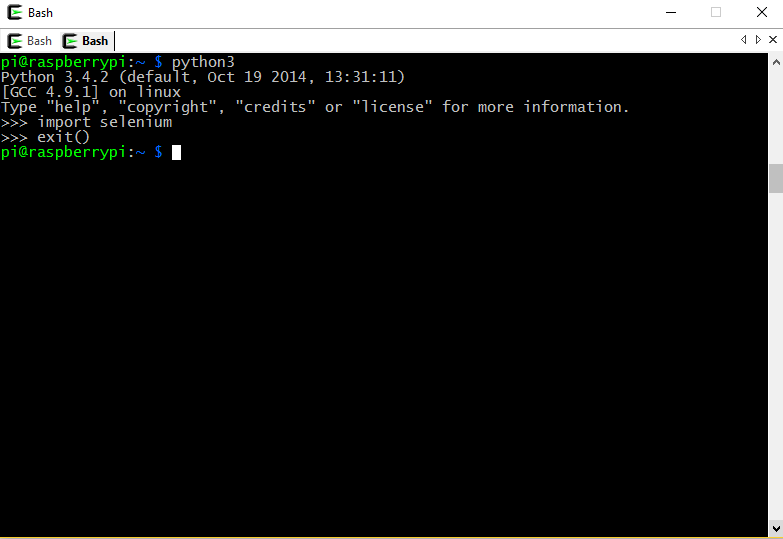
To use pip to get Selenium typesudo pip3 install Seleniumin the terminal. At this point, it is a good idea to make sure Selenium has installed properly.
In your terminal type
python3.
Now have python import the Selenium package withimport selenium. If you don't get an error selenium is installed and ready to use. Exit python by typingexit().
For Selenium to operate the Firefox browser it relies on a program called geckodriver. We need to get it and place it in the /bin folder so Selenium can find it.
Enter your Downloads folder with
cd ~/Downloads.
Now typewget https://github.com/mozilla/geckodriver/releases/download/v0.11.1/geckodriver-v0.11.1-arm7hf.tar.gz
This should have downloaded the geckodriver archive. Next we need to unzip it withtar -xvzf geckodriver-v0.11.1-arm7hf.tar.gz
Finally we need to move the geckodriver program to /usr/bin so Selenium can find it. We can do this with the Linux move command.sudo mv geckodriver /usr/bin/geckodriver
Now that we have selenium installed along with geckodriver we need to install Firefox on the Raspberry Pi. Simply type
sudo apt-get
              install iceweasel
into the terminal. If you get an error here there is a good chance you forgot to update the Raspberry Pi's package list withsudo apt-get updateearlier. Update and then try again.
We are finally ready to get coding!
- Selenium Code
If you've never coded with Python before this next part may be confusing. I hope to explain things in such a way that you can follow along and modify this code to suit your needs. If you have questions or suggestions don't hesitate to send me an email!
To begin, lets create a folder to hold our scripts with
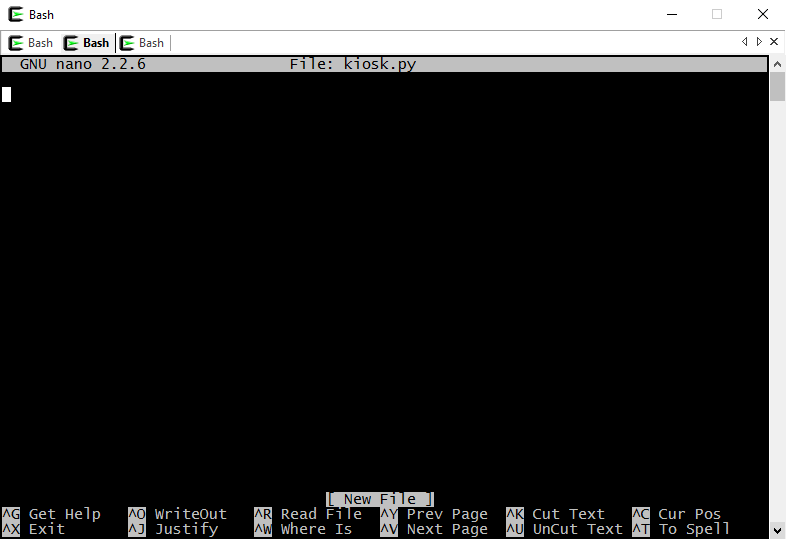
mkdir ~/Scripts. Now, typecd ~/Scriptsto enter the new directory. To create our python script, typenano kiosk.py
You should now see the nano text editor.
Since this is just an example, lets write code that opens reddit, google, and slashdot. Then our code will tell the browser to switch tabs every 20 seconds.
First lets look at the complete code and then I will explain.import time from selenium import webdriver from selenium.webdriver.common.desired_capabilities import DesiredCapabilities from selenium.webdriver.common.keys import Keys #caps = DesiredCapabilities.FIREFOX #caps["marionette"] = True #caps["binary"] = "/usr/bin/firefox" #Open first tab browser = webdriver.Firefox() browser.get("https://www.reddit.com") browser.implicitly_wait(20) #Open second tab new_window = browser.find_element_by_tag_name("body").send_keys(Keys.CONTROL + "t") browser.switch_to.window(browser.window_handles[-1]) browser.get("http://www.google.com") #Open third tab new_window = browser.find_element_by_tag_name("body").send_keys(Keys.CONTROL + "t") browser.switch_to.window(browser.window_handles[-1]) browser.get("https://slashdot.org") #browser fullscreen new_window = browser.find_element_by_tag_name("body").send_keys(Keys.F11) #Every 20 secs change tab x=1 while x: try: new_window = browser.find_element_by_tag_name("body").send_keys(Keys.CONTROL + Keys.TAB) time.sleep(20) except: break
Copy and paste or type this code into nano. Be careful to check that the spacing of the while loop near the end of the code was pasted correctly. If it wasn't, correct it. Now exit nano by pressing ctrl+x. When you are prompted to save type y and hit enter.
To run the code type
python3 ~/Scripts/kiosk.pyinto the terminal. It is important to note that you must do this in a terminal window on the desktop of the Pi for it to execute correctly. If you try to run the code from a remote terminal session (IE while SSHed into the Pi) you will get an error. If you want to do this remotely use a remote desktop client like VNC.
After running the code you should see Firefox start, open all three websites, go fullscreen, then begin to cycle through each tab. If the webpages you need to open do not require login credentials you are essentially done with the code. Put the desired urls between the quotation marks on the browser.get lines. You can also add as many seperate tabs as you like by copy/pasting the following chunk of code as many times as you need.
new_window = browser.find_element_by_tag_name("body").send_keys(Keys.CONTROL + "t")
browser.switch_to.window(browser.window_handles[-1])
browser.get("http://YOUR_URL")
If you want to use a website that requires login credentials stick around. If not, continue to the next section.
For this example we will log into reddit. We will need Selenium to find the user name and password text entry forms and then type our username and password in. Then Selenium will need to submit our credentials. For us to instruct Selenium how to find these elements we must first find them ourselves.
First, open reddit in Firefox. Then, find the username and password entry boxes and right click inside them. Select 'Inspect Element' from the drop down menu. At the bottom of the browser you should see the Inspector.
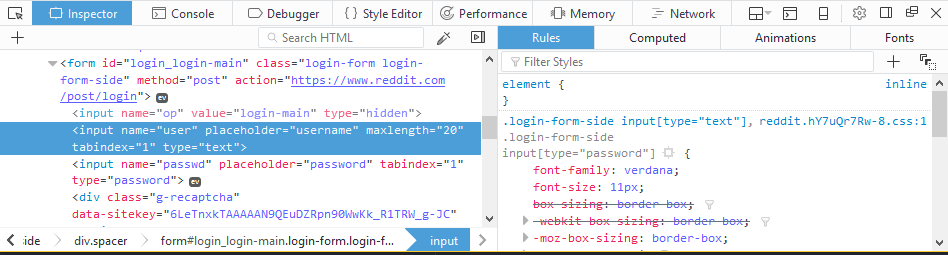
We can see that Selenium should look for
<input name ="user"...for username and<input name ="passwd"...for password. The element 'input' isn't unique in the document but the name is. So we can instruct Selenium to look for these elements by addinguser = browser.find_element_by_name('user')andpassw = browser.find_element_by_name('passwd'). The last thing we need to find is the login button. Head back to firefox and right click on the login button. Select 'Inspect Element' again.
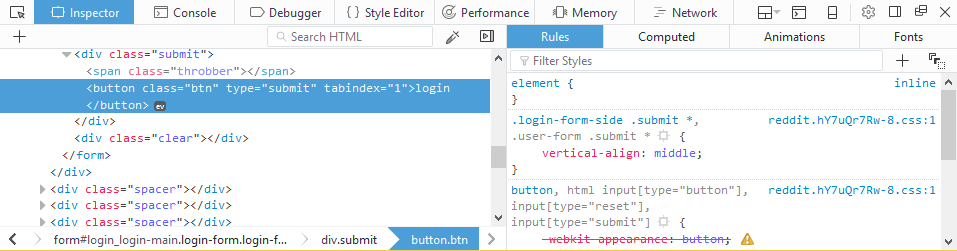
This one will be a little more tricky. It isn't the only button on the page and it isn't the only button that has the type of submit. However, it is the only button that has the text login. We can use Selenium's XPATH module. First we must import By. Anywhere near your other imports at the top of your script add the line
from selenium.webdriver.common.by import By. Now, underneath where we instructed Selenium to find the password entry box, add the following line:form = browser.find_element(By.XPATH, '//button[text()="login"]').
Home stretch, the hard part is done but now we have to actually do something with the elements we have found. Lets tell Selenium to input our username into the username box with
user.send_keys('yourusername')and our password into the password box withpassw.send_keys('yourpassword'). Finally, we submit the credentials withform.submit().
There is one final line that we should add. Since we are having Selenium search for elements on a webpage we want to make sure that it will wait for the page to be fully loaded before beginning its search. We can do this with
browser.implicitly_wait(20). Insert this line under the browser.get line before Selenium is instructed to search for elements.
Your block of code should now look something like this:
import time
from selenium import webdriver
from selenium.webdriver.common.desired_capabilities import DesiredCapabilities
from selenium.webdriver.common.keys import Keys
from selenium.webdriver.common.by import By

#caps = DesiredCapabilities.FIREFOX
#caps["marionette"] = True
#caps["binary"] = "/usr/bin/firefox"

#Open first tab
browser = webdriver.Firefox()
browser.get("https://www.reddit.com")
browser.implicitly_wait(20)
user = browser.find_element_by_name('user')
passw = browser.find_element_by_name('passwd')
form = browser.find_element(By.XPATH, '//button[text()="login"]')
user.send_keys('yourusername')
passw.send_keys('yourpassword')
form.submit()
Now save your code and give it another run. This time you should see the script successfuly log into Reddit before opening the next tab.
There are many different ways that websites may handle login. For this reason there is no way for me to cover every possibility so instead I will point you to Selenium's documentation. Locating Elements is a good place to start. You can download the kiosk script directly from GitHub
Now that we have a working script let's move on to automation.
- Automation
At this point our script should successfully launch Firefox, open some tabs and log in if necessary, go full screen, and begin to cycle through the tabs. However we still need to launch the script manually. This is at the very least a hassle for most applications. So now, let's work towards configuring the Pi to automatically launch our script when the desktop environment boots up.
On your pi open a terminal screen and type
nano /home/pi/.config/lxsession/LXDE-pi/autostart
At the bottom add these lines:
@xset s noblank
@xset s off
@xset -dpms
/usr/bin/python3 /home/pi/Scripts/kiosk.py
xset s noblank prevents the pi from blanking the screen do to inactivity, xset s off tells the pi to disable the screensaver, and xset -dpms tells the pi to disable Energy Star features. The last line calls our script.
Press ctrl+x hit y and press enter. Now typesudo reboot now.
Your pi should reboot and after the desktop environment launches the Firefox browser should open as our script does its thing!
However, I ran into an issue here. The browser launched and then immediately timed out when attempting to load the first page. Firefox was opening before the Pi's network connection came up. Since our script waits for the first page to load this causes the whole program to screech to a halt. Thankfully this is an easy fix. Go back to our kiosk.py script and add the following line after the imports but before the script begins to open websites.
time.sleep(20)
Now our script will 'sleep' for 20 seconds before attempting to load the first web page. This should give the network adapter plenty of time to connect. Reboot the Pi and see if this corrects the issue.
Now we should be fully automated!
Finally, we should take some time to talk about security.
- Security
This section isn't going to be very big because how to go about securing your Pi will depend entirely on the environment it is operating in. If this is for a home application then you may need very little security other than keeping up with system updates. If this is for a business then you will want to consider security very carefully.
If you neglect security as a business the Pi may become a point from which attackers can launch more damaging attacks. Additionally, you may need to control physical access to the Pi. Especially if you are using the Pi to log into websites that contain sensitive data. Remember, you have coded the username and password in plain text into your script. Someone could simply steal the SD card and view the password. If you can't control physical access you may want to encrypt the entire OS.
Our application uses the Pi as view screens for a NOC. View only accounts were made on the relevant websites and the Pi's physical location is in an area that the public does not have access to. As the websites that our Pi must access are all hosted internally the Pi itself does not need to access the internet. To prevent the Pi from accessing the internet we created rules in iptables to block network access apart from ssh from the internal LAN and the required websites.
Configuring iptables is beyond the scope of this walkthrough but if you would like to read more you can go to the Arch Wiki iptables page. The Arch wiki is a fantastic source of information for many Linux subjects. As a sidenote, iptables is being replaced with nftables so if you are going to be learning from scratch you may as well learn nftables instead of iptables. You can read about it on the Arch Wiki nftables page.
With that, this guide is finished! I hope I have been clear and you are able to create a Kiosk that is customized to you or your organization's needs. If there is any confusion please email me. I created this website as a way to share my projects and more importantly, to learn from others. If you have a suggestion of how I could have done something better don't hesitate to email as well! I would love to hear and learn from you too!