Cellular Drive Test Mapping
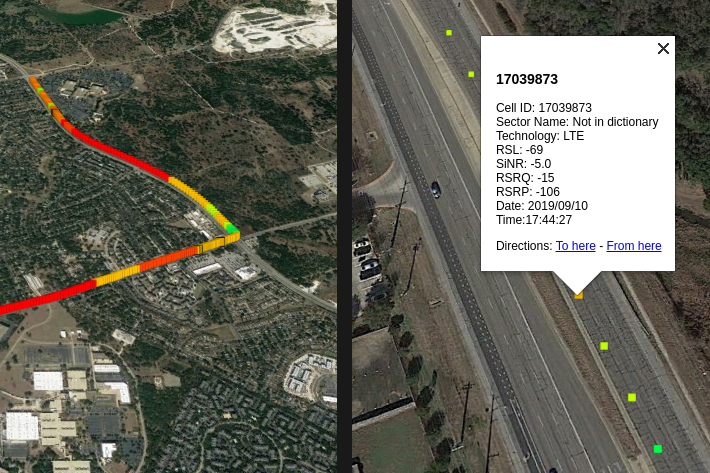
I've made a program that will allow you to make your own cellular
signal strength maps. Why would you want to make your own cellular signal
strength maps? Maybe you work for a small telecom that does not have the
funds for expensive proprietary drive testing software. Or perhaps you
want to show your cellular company exactly how bad their coverage sucks!
Whatever the reason, you can be up and going in a few minutes.
Unfortunately this process will only work for Android phones at the minute
- sorry Apple users.
I've broken this guide into 3 parts: Installing and Configuring G-MoN, Installing and Configuring DriveTest Map, and Viewing your Map Files with Google Earth.
If you are interested, lets get started!
- Installing and Configuring G-MoN
The first step is to get G-MoN installed and configured. What is G-MoN? It is an amazing free Android app developed by C. Knuetter that allows you to view detailed cellular information and log that information to a file. It also will allow you to see information about nearby WiFi networks. You can install it for free by visiting the Google Play Store.
Once you have G-MoN installed on your Android phone we need to change some configuration settings so that it will log drive tests to a file that we can use later.
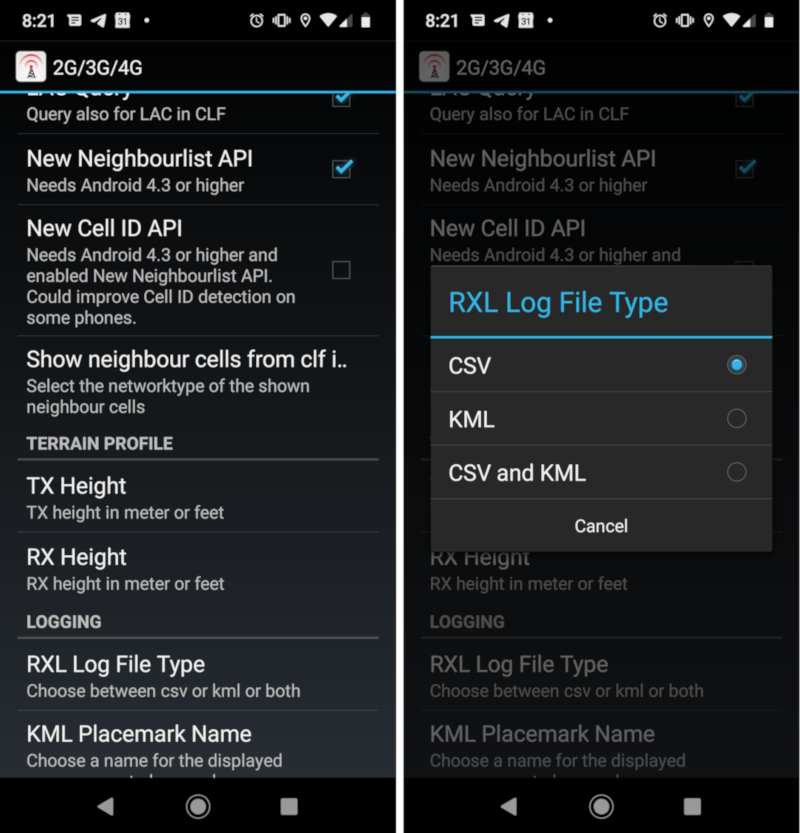
First, open the G-MoN app on your Android phone and touch the three vertical dots in the top right of the application. Then, touch settings. Now select 2G/3G/4G and scroll down until you see 'RX Log File Type.' Touch that and chose either 'CSV' or 'CSV and KML.'
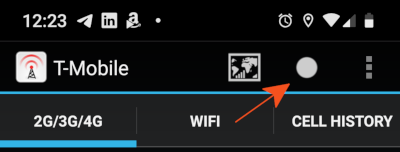
We are installed and configured, that was difficult wasn't it? Lets perform our first drive test! Return to the main screen of the app. Near the top-right of the screen is a circle, press it. G-MoN is now logging all the data on the screen to a logfile on your Android phone. Go for a quick drive to generate an interesting log file. Alternatively, I provide a sample drive test file in the next section if you just want to try generating a map.
Now we need to get that file off of your phone. By default G-MoN will store the file on your phone's internal memory in a folder named gmon. Inside you will see a file named something like
gmon_gsm_rxl_2019_09_08_17_12_30.txt. Of course yours will have a different date and time. Transfer this file to your computer in whatever way is most convenient for you, USB, email, carrier pigeon.
That's it, we just need to install DriveTest Map and process that file! I promise it will be easy.
- Installing and Configuring DriveTest Map
DriveTest Map is completely free, licensed under GPL, and open source. You can take a look at the repository on GitLab if you would like to see the source code. I am not a professional coder but if you are and see something that I could have done better let me know or contribute to the project directly! gitlab.com/tibernut/drive-test-map
For everyone else, you can grab binaries for either Windows or Linux.
Download DriveTest Map for Linux
Download DriveTest Map for Windows
DriveTest Map is completely portable, simply unzip the downloaded file and you are done.
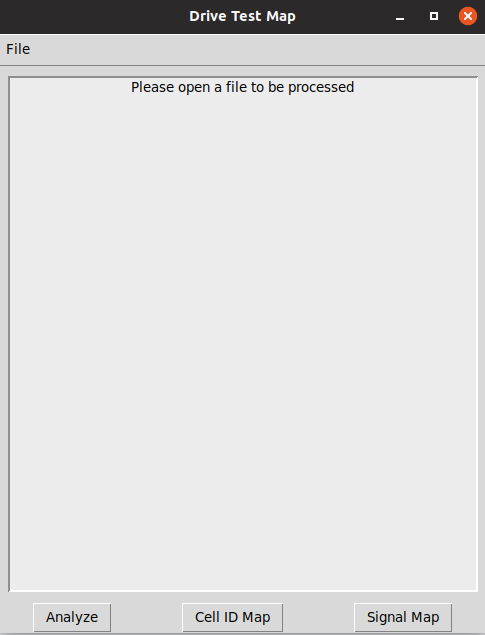
Double click the DriveTestMap file to start the program. You should see a very simple interface. Before we do anything, we need to load the drive test logfile that you got from your Android phone earlier. To load the file click file>open. Then navigate to where you saved the file, select it, and click open.
If you haven't gotten around to actually doing a drive test yet, its OK, you can use this sample drive test.
To process the file, click one of the three buttons at the bottom of the application window. Or click all of them!
- Analyze - Displays some generalized information about the file that was loaded. This is helpful when you have many drive tests files and are trying to find a specific one.
- Cell ID Map - Creates a Google Earth KML coloring each measurement based on which cell the cellular device was attached to. You can get a visual representation of which cell towers you are connecting to in a given area.
- Signal Map - Creates a Google Earth KML coloring each measurement based on the measurement specified in prefs.json. By default this is RSL. RSL is appropriate for 2G and 3G cellular measurements. However it isn't that useful for LTE. LTE has new measurements to help you determine the quality of the signal. SiNR, RSRP, and RSRQ. Of these I have found SiNR to be the most helpful. SiNR of 0? Good luck watching that video. SiNR of 20? You are rockin' buddy!
By default DriveTest Map will save the generated kml files in the same directory where you stored the gmon drive test file. You can change this behavior in the application preferences.
I wanted to quickly go over the preferences so that you can configure the application to be suitable for your needs. Open the preferences by clicking file>preferences.

- # of Map Colors for Signal - This allows you to change the number of color gradients used when generating signal maps. The colors will range from blue (terrible signal) to red (excellent signal). I don't know how useful it is to have 256 shades between blue and red, but its there if you want to go crazy!
- Meas. used for Signal Map - Here you can change which measurement the program looks at while creating signal maps. Your options are RSL, SiNR, RSRP, and RSRQ. Please note that SiNR, RSRP, and RSRQ are specific to LTE connections. If you use one of them DriveTest Map will not attempt to plot any 2G or 3G measurements detected in your drive test logfile. If you want to include those, use RSL!
- Cell Dictionary Path - This is more for the convenience of
any provider that may use this tool. You can create a csv file that
DriveTest Map can use to translate CIDs into friendly names. If you
are doing handover analysis it is much easier on the brain to click a
measurement and see Awesome_CellSite_Beta than 101041. To use this
feature point this option at a csv file that contains all your CIDS
and their friendly names. For Example:
101040, Awesome_CellSite_Alpha
101041, Awesome_CellSite_Beta
101042, Awesome_CellSite_Gamma
- Save Path - Just where you want the program to output the generated kml files to. By default it will stick them in the same place where it found your drive test logfile. If this behavior annoys you, change this to wherever you desire!
One last bit for those of you who are interested in a cli version of this utility. This functionality is available via the drivetestProcess binary included with the program. It is pretty self explanitory but below are the command line switches available.
chris@marvin:~/DriveTestMap_linux$ ./drivetestProcess --help
usage: drivetestProcess [-h] [-s] [-c] [-b] [-a] [filename]

positional arguments:
  filename       The GMON generated csv that you wish to process

optional arguments:
  -h, --help     show this help message and exit
  -s, --signal   generate SIGNAL map, update prefs.json in order to change the
                 type of signal measured.
  -c, --cellid   generate cellid map
  -b, --both     generate both cellid and rsl map
  -a, --analyze  generate quick summary of gmon csv file
chris@marvin:~/DriveTestMap_linux$
Next up, Google Earth.
- Viewing your Map Files with Google Earth
There really is nothing to this. Just download Google Earth Pro (which is free) and double click the kml file you generated with DriveTest Map.
You can get Google Earth Pro here. Just make sure you download 'Google Earth Pro on desktop.'
The Cell ID Map plots each detected cell id in a different color. This can help you visualize a particular cell's serving area or assist with some basic handover planning.
Cell ID Map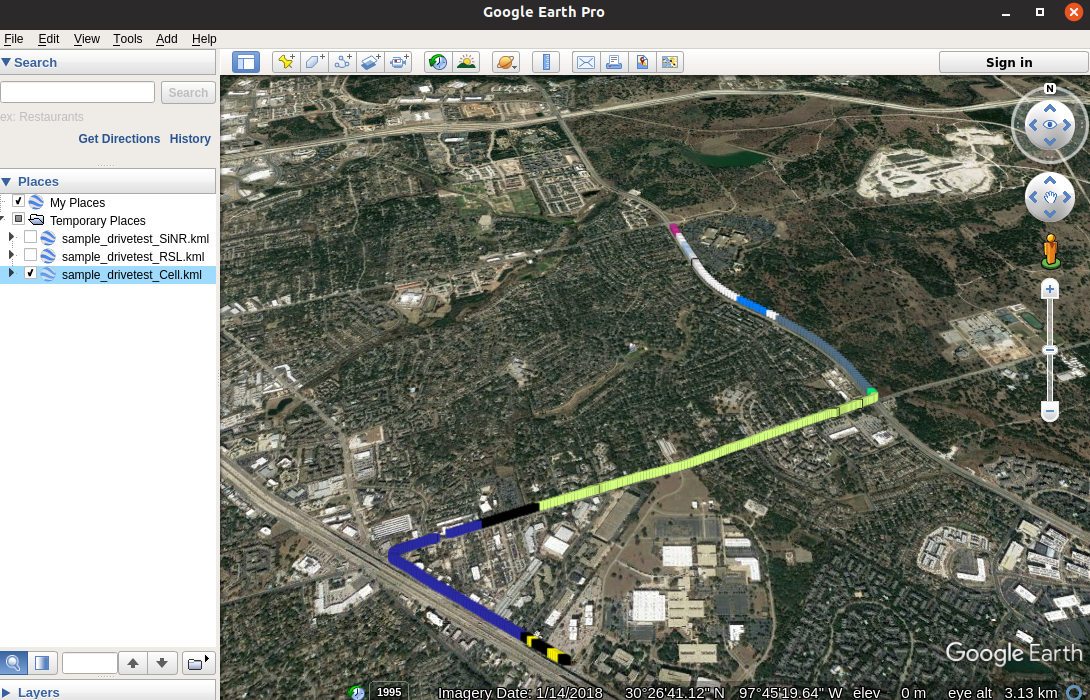
When viewing your kml files with Google Earth, you can click on any of the points to see more detailed information about that measurement. This includes information like the date and time that the measurement was taken, relevant signal strength measurements, and cell id.
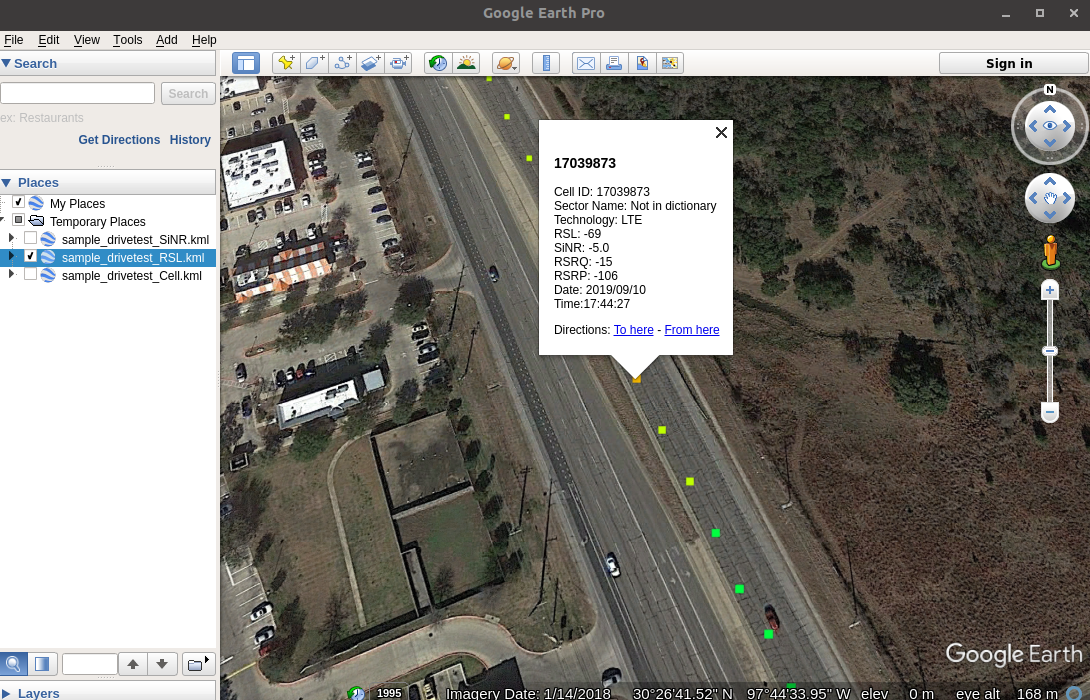
By changing the Meas. used for Signal Map option in the preferences section of DriveTest Map, you can generate signal maps based on RSL, RSRP, RSRQ, or SINR.
RSL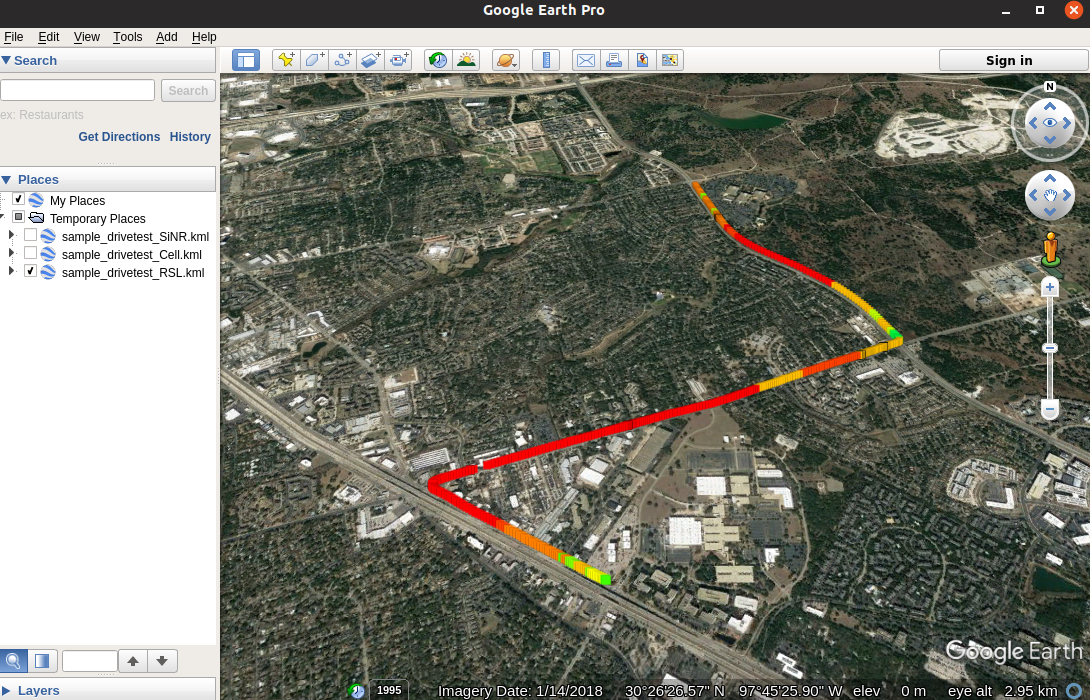
SiNR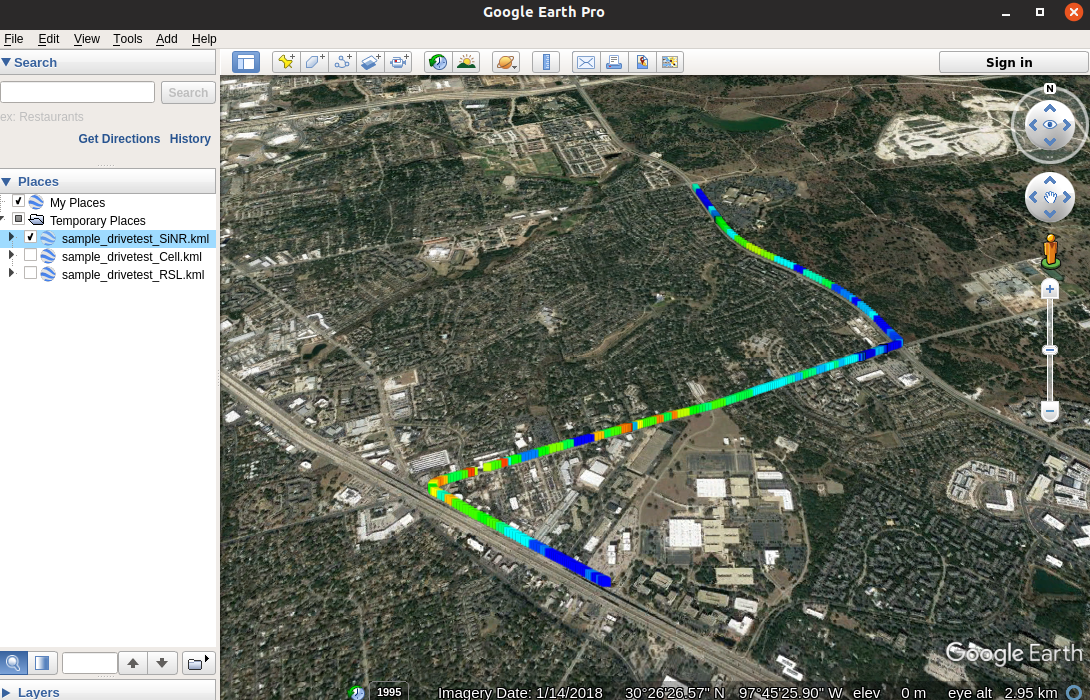
RSRP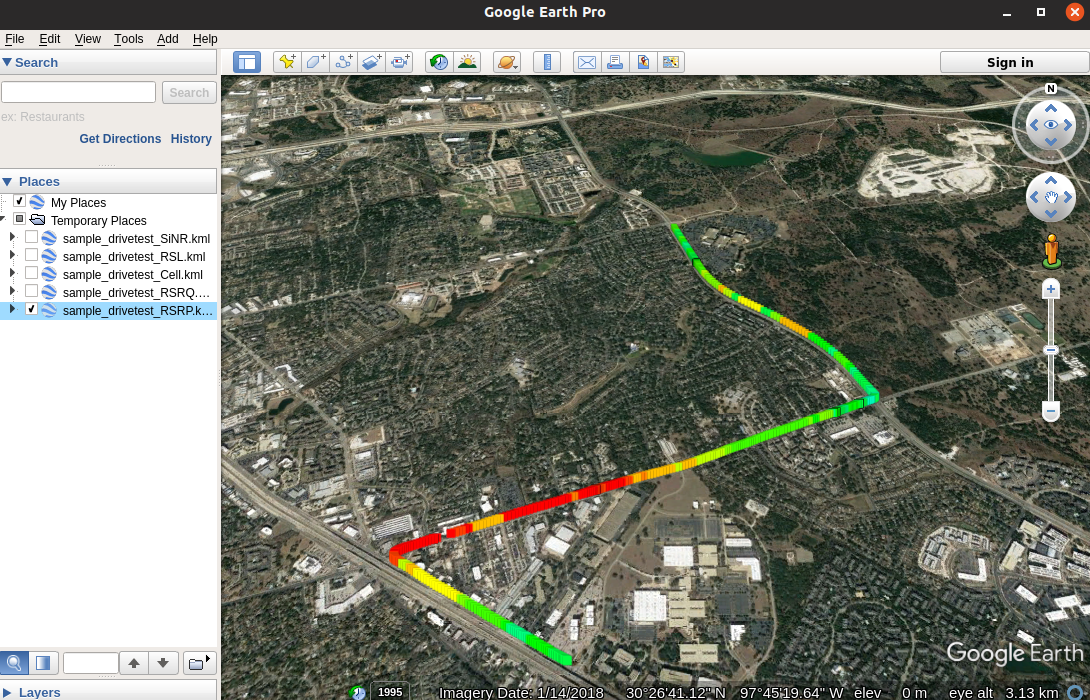
RSRQ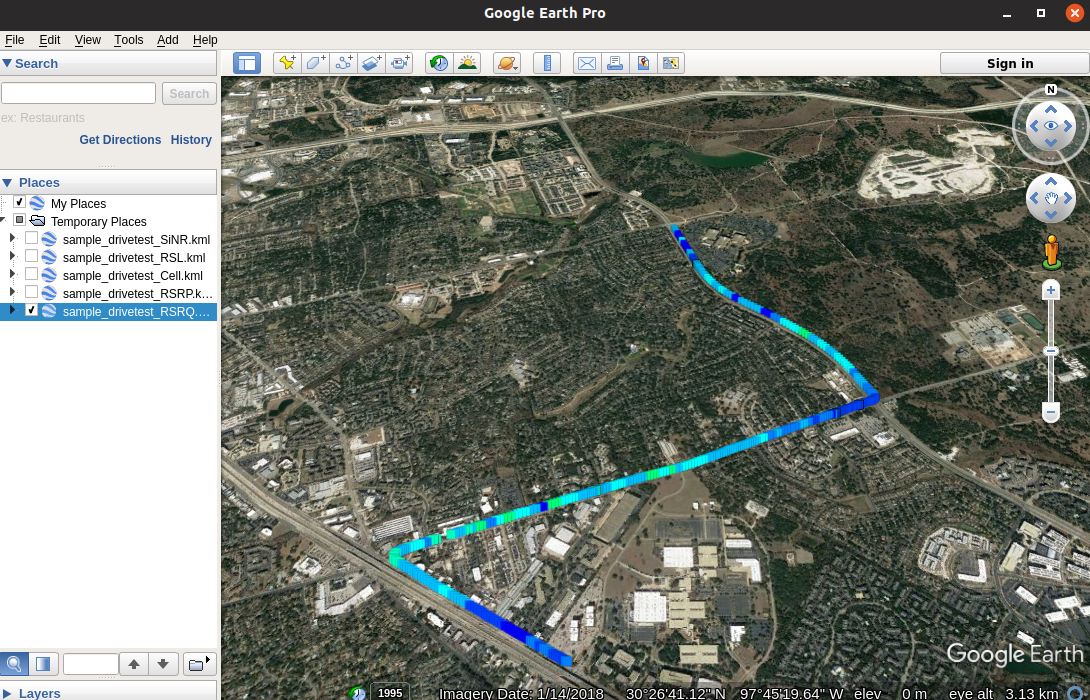
I hope this program can be of some use to you! If you are using it send me an email at sanitizedinput@gmail.com! I'd love to hear from you. If you find a bug or have a feature request I will try to add it as time allows. Thank you for taking the time to try out my little program!